
It's essential to stay on top of engine maintenance to make sure it continues to perform at its best, all while preventing a costly mechanical failure.
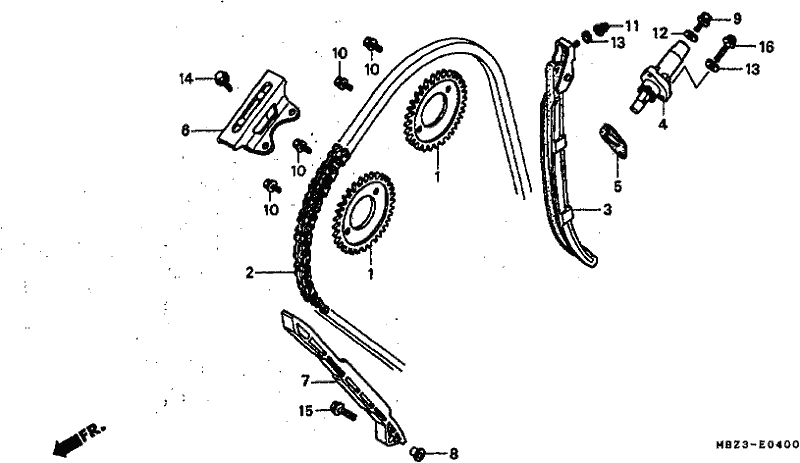
A timing chain or cam chain is an integral part of a motorcycle engine. It's a chain which is connected to sprockets inside your engine which controls the opening and closing of the valves in the engine.
The timing chain is held on the sprockets using a cam chain guide (usually in plastic) which is pressed against the chain using a cam chain tensioner.
The pressior used by the cam chain tensioner is crucial for the timing chain. To lose and it will skip a few teeth on the sprockets meaning your engine is out of timing in the worst case, bend the valves.
A chain with too much tension can also fail, as it is placed under excessive stress. Tension increases friction and heat in the chain, which can result in failure.
Symptoms of a bad or failing timing chain tensioner:
- Engine rattles while idling
- More then normal vibration, even when idling
- Engine misfires or runs poorly
- Metal shavings found in the oil
- The engine won't start or fails
- Check Engine Light is on
The most common design used today is essentially a spring driven worm.
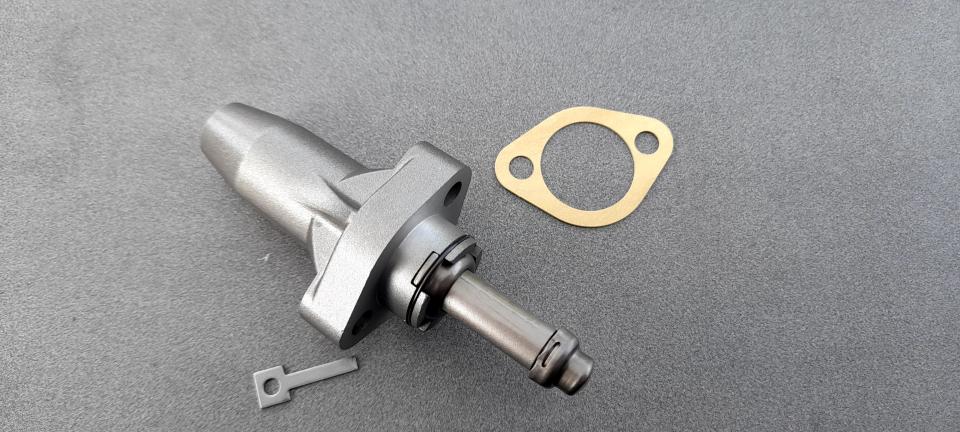
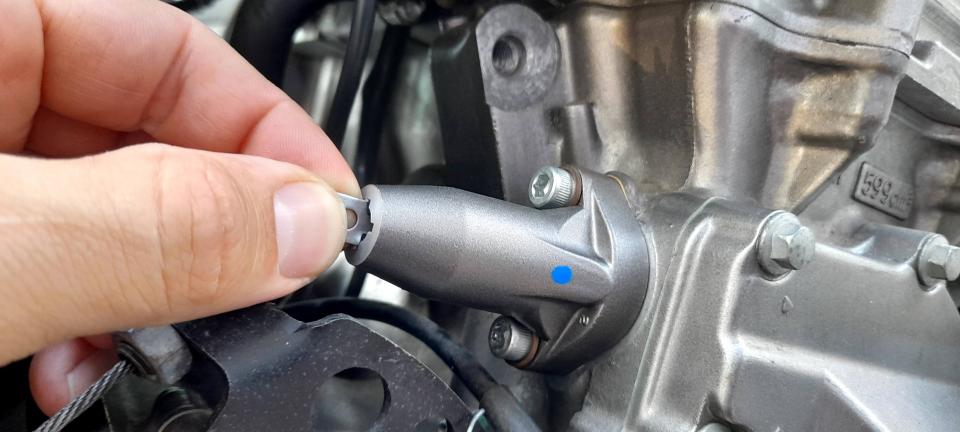
There is normally a housing that bolts to the cylinder in such a way as to bring the plunger of the tensioner to bear on a cam chain guide, as in the picture.
The plunger itself has an internal screw gear cut into it, and is keyed to the housing so that it cannot rotate along its length.
A torsion coil spring is anchored to the housing and drives a shaft cut with a worm gear the threads into the plunger.
This is the part that you turn to release tension when servicing.
When replacing your cam chain tensioner, there are two options, an automatic one (OEM by all manufactures) or manual tensioner.
Both have their pros and cons. The manual tensioner never needs replacing as it's simply a bolt which you press against the cam chain guide by screwing it in. Is it out of alignment, simply adjust the screw.
But you never know what is the correct tension, as mentioned above, this can be catastrophic. Manufacturers deliver their bikes with an automatic tensioner, meaning a spring is putting on the pressure.
If this spring fails, and they do, you need to replace them.
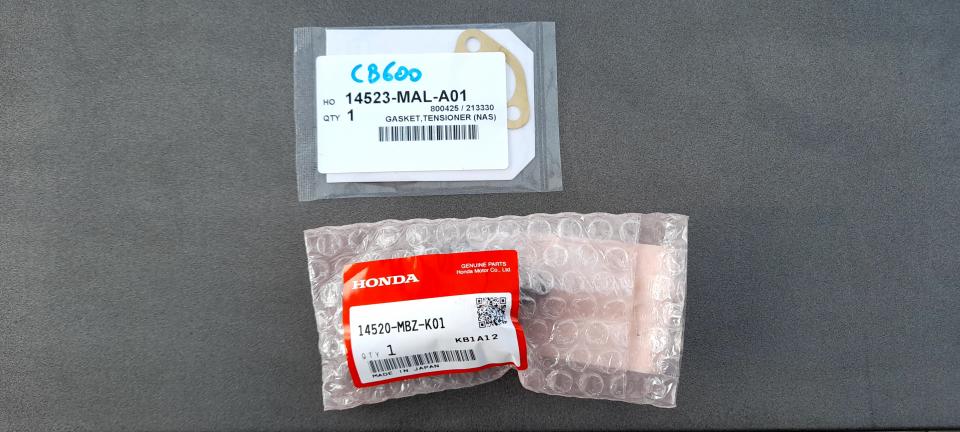
For this exercise we are going to change the cam chain tensioner of a Honda CB600 Hornet, model year 1999.
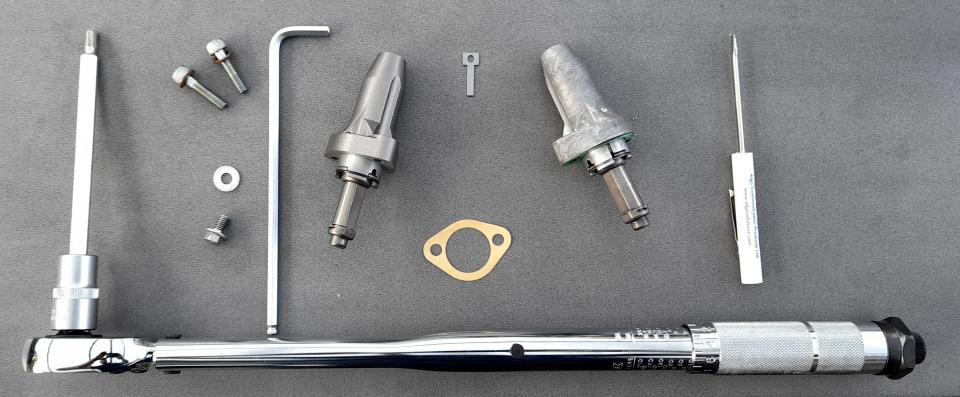
What do you need - offcourse a new cam chain tensioner, in this case an OEM automatic version, a new gasket, and some tools.
Also note that his bike only requires 1 cam chain tensioner, some bikes require two!

Locate the cam chain tensioner on your engine or refer to the owner's manual. This step can also require you to remove some bodywork.
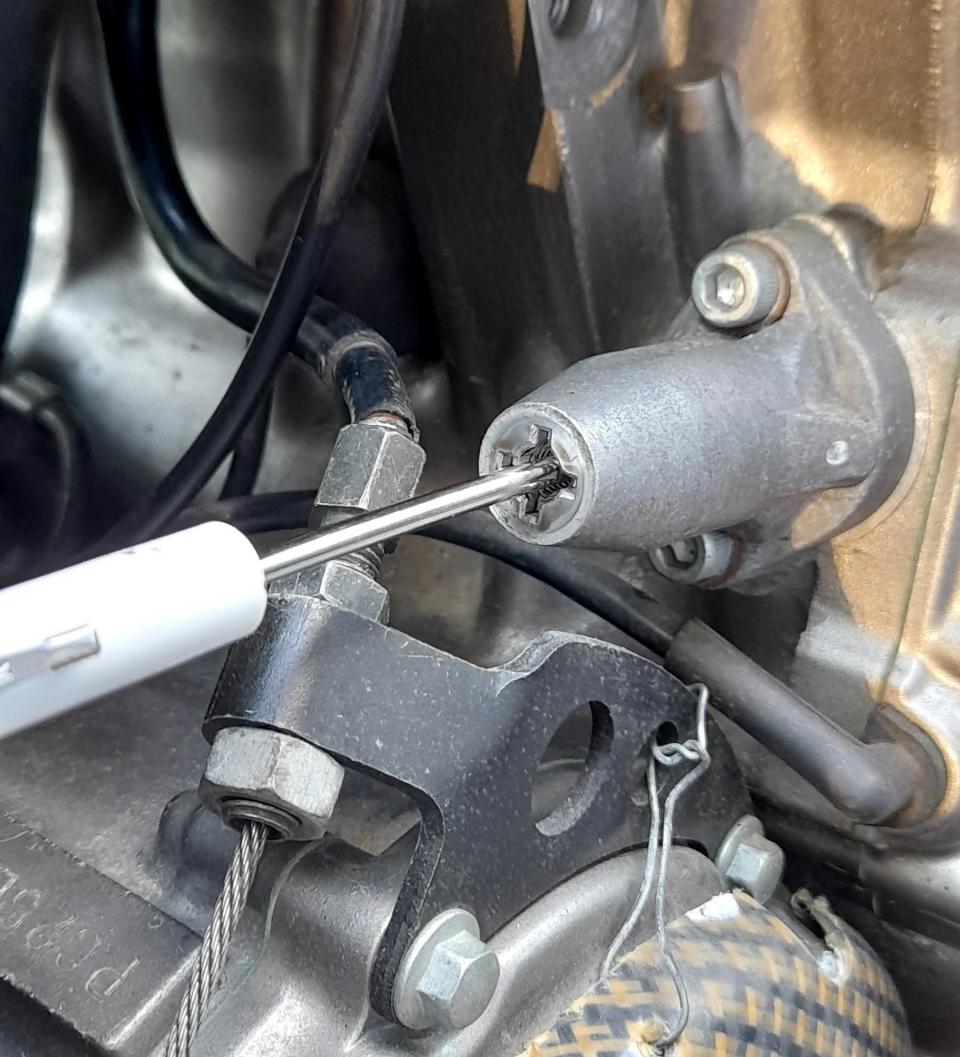
If the cam chain tensioner is fully unwind, lock the screw in place using the handy tool. If you don't have this tool, you need an extra pair of hands to keep the tension off.
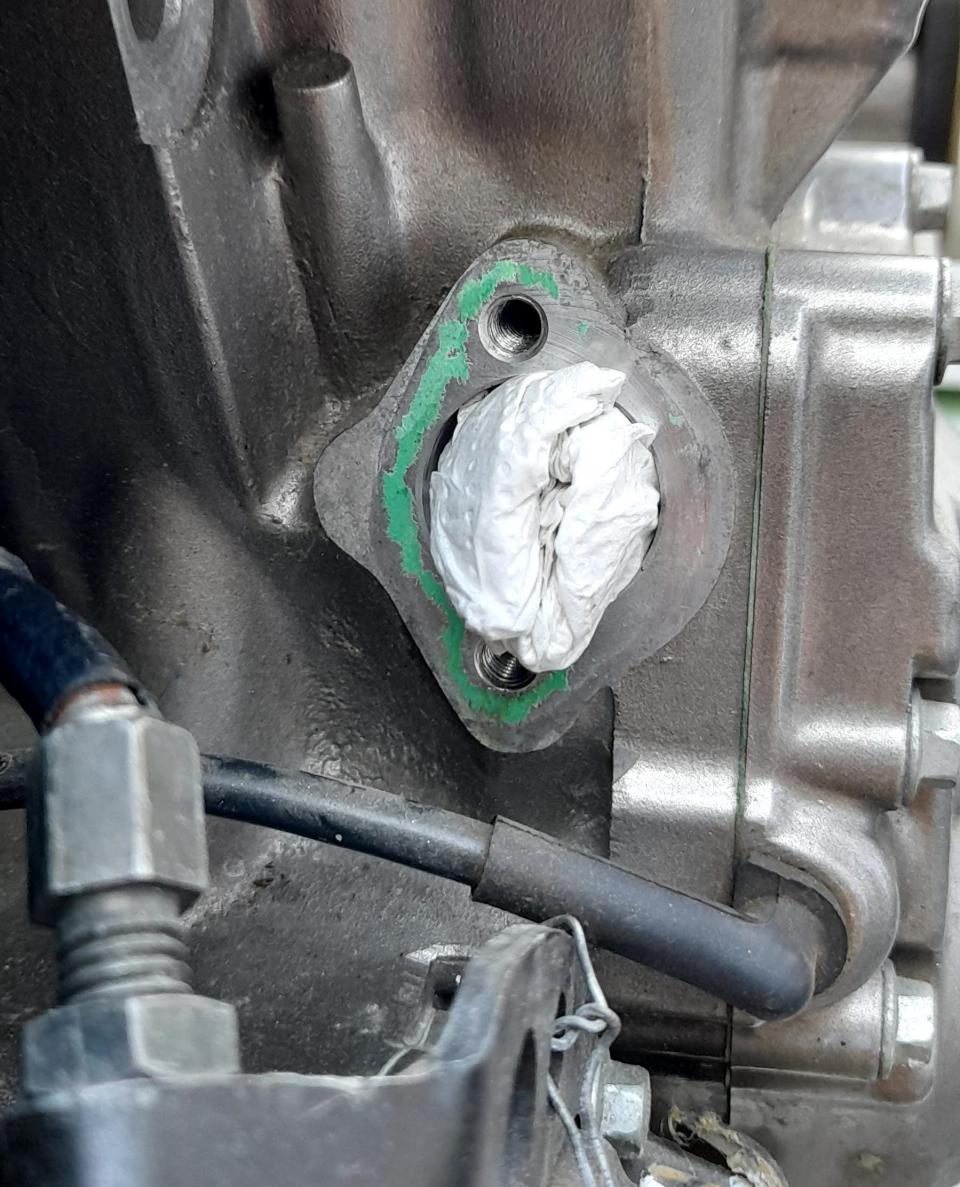
Remove the cam chain tensioner of the bike and take extra care of the gasket. Don't let anything fall into the gaping hole!
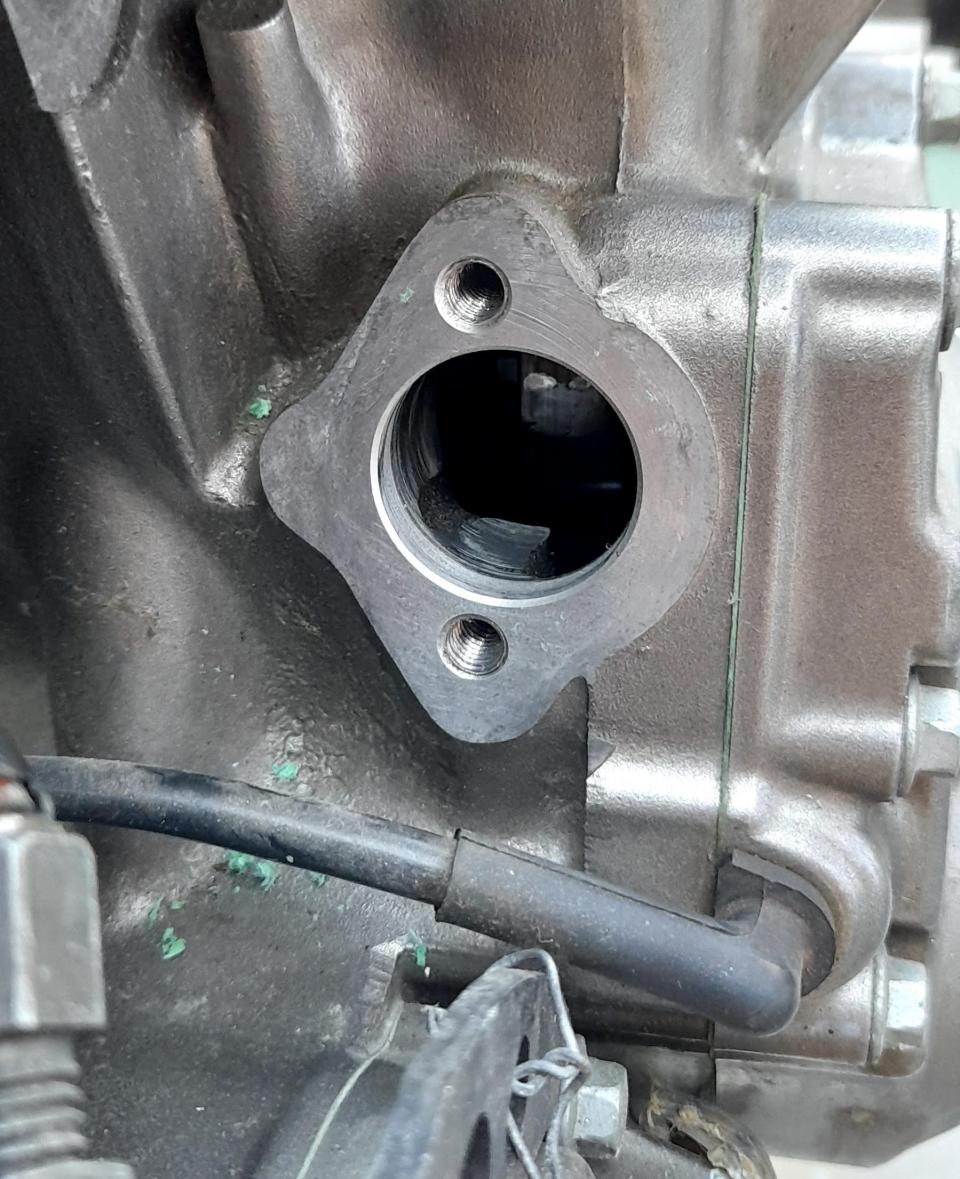
Clean the surface on the engine block so the new gasket will flush. Again, not let any dirt or debris fall into the engine.
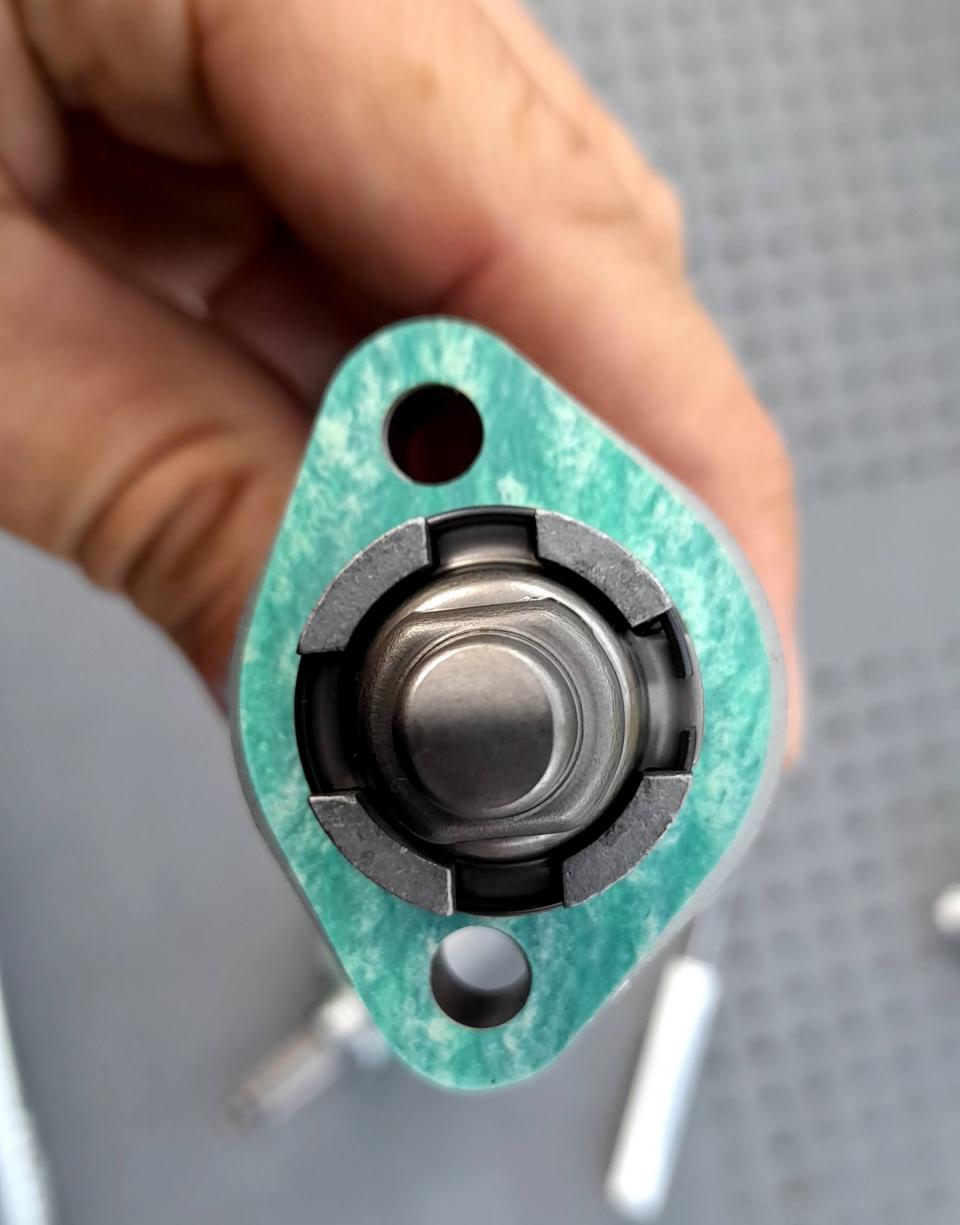
One cleaned, you take the new cam chain tensioner, still fully retracted, and put it on the engine with the new gasket in between. The green side of the gasket needs to be touching the engine.
Secure the bolds of the cam chain tensioner and check the owners manual for the correct torque settings of these screws.
Once the cam chain tensioner is on, slowly unwind the cam chain tensioner. You will feel the spring being released and pressing against the cam chain guide.
Bold on the cap screw on the chain tensioner and you're ready.
Double check everything and once verified all is ok, you can start your engine. The cam chain tensioner will now press the cam chain with correct pression onto the sprockets, resulting in a smooth running engine.
Congratulations on completing this task, nothing complicated, but essential for a smooth running bike.
Be sure to come back for more content like this very soon!